With Heyzine's Professional and Premium Plans, you get a lot of data about the visits to your publications directly on the flipbook statistics page. Still, sometimes, you might want to dig even deeper or integrate it with the rest of your website visitor's data. You can use Google Analytics for this, and here we'll show you how easy it is to set it up.
Set up Google Analytics
The first step is to register a Google Analytics account here. It's free.
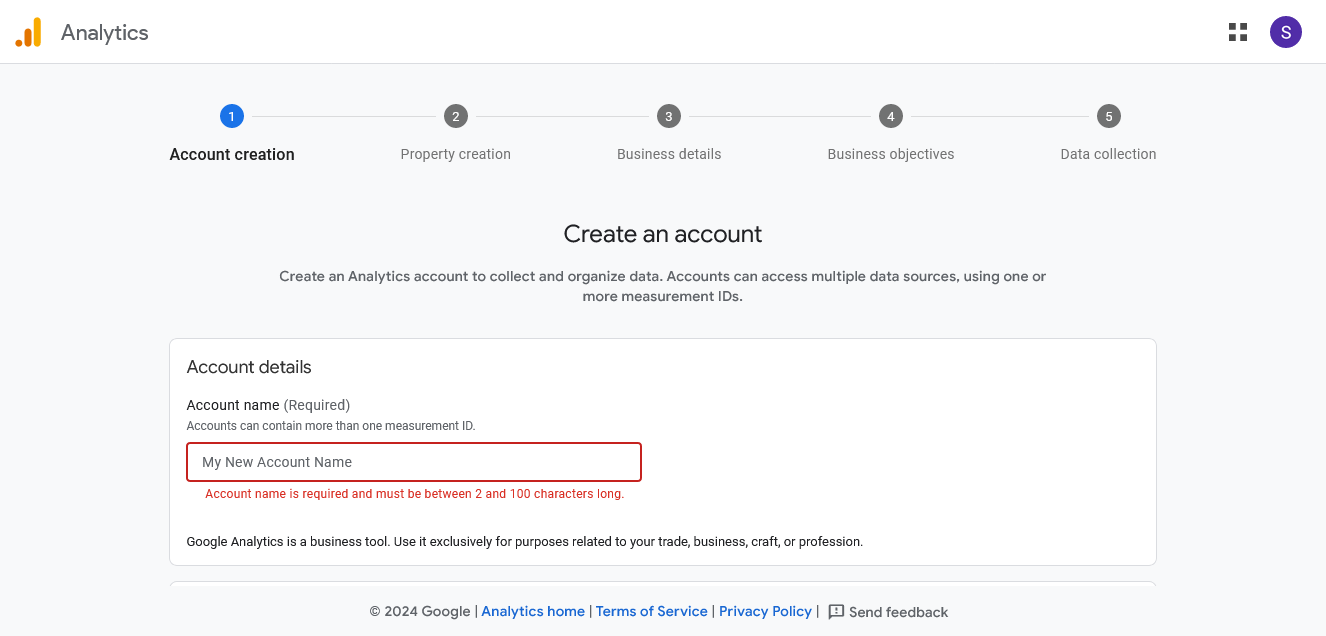
It will start asking for an account name, to accept their terms and conditions, and a few other things about your business, like the size and industry.
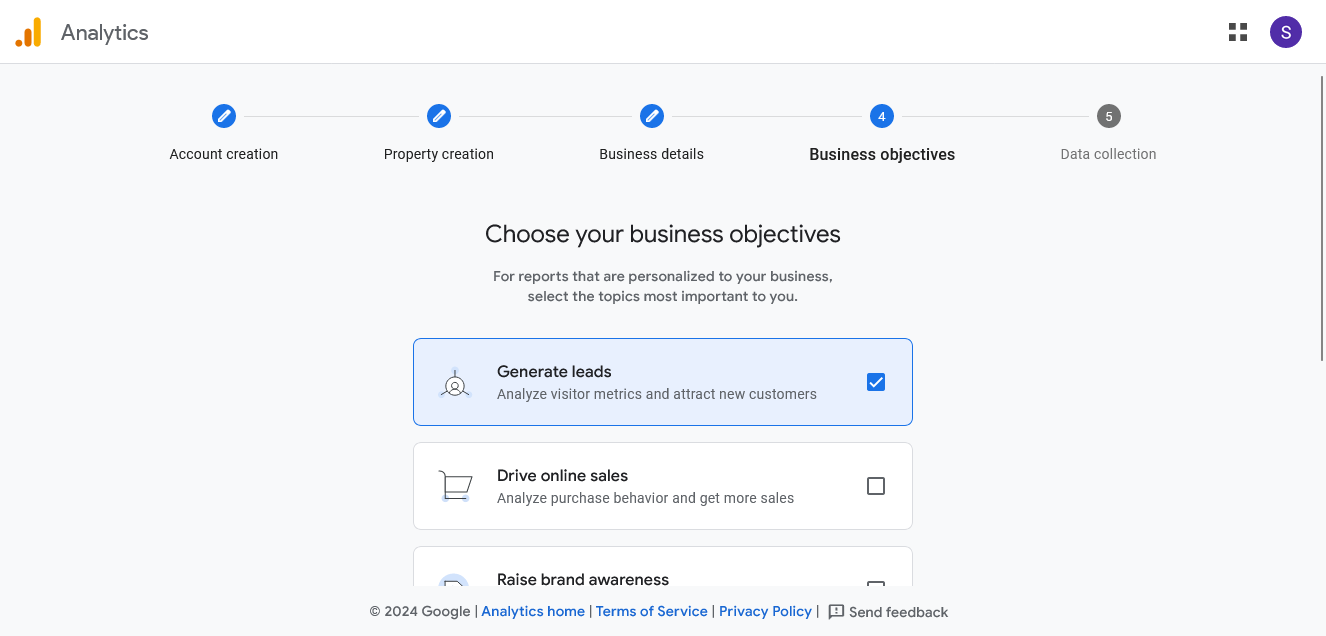
After that, in the "Business objectives" step, you will choose how you plan to use Google Analytics. This is not too important, but it will set some defaults for you.
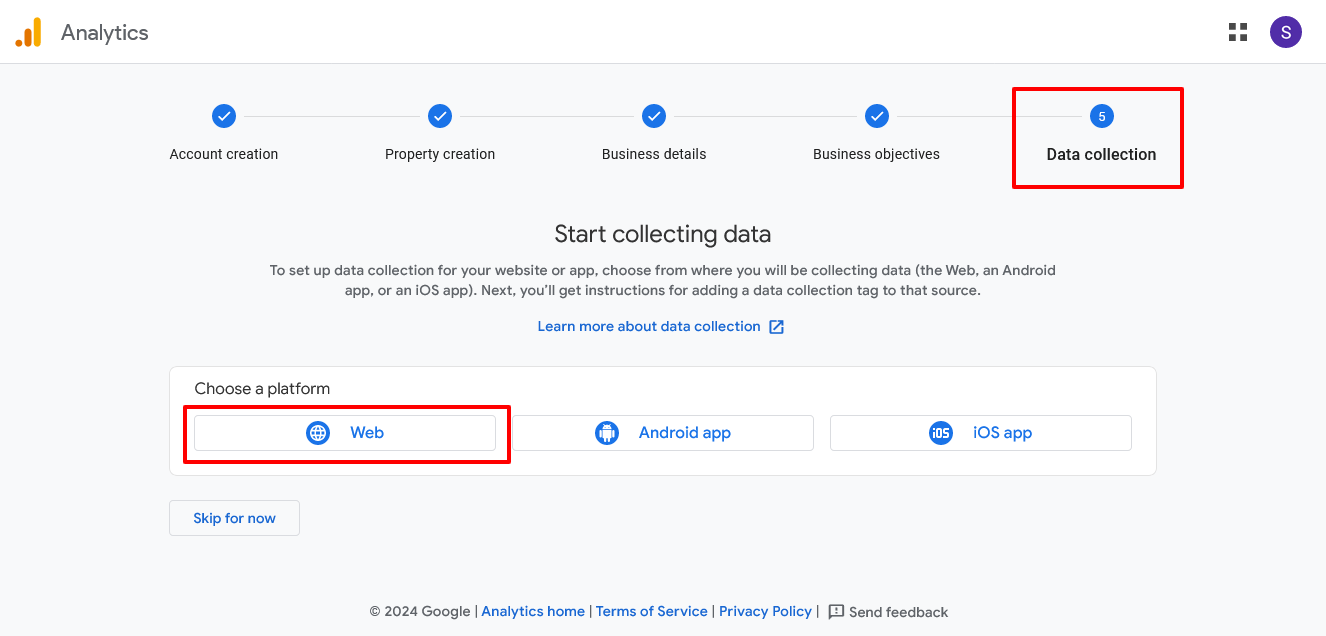
Moving on, we come to the "Data collection" section, which is the most critical part of the initial configuration. Here, we have to choose the "Web" platform:
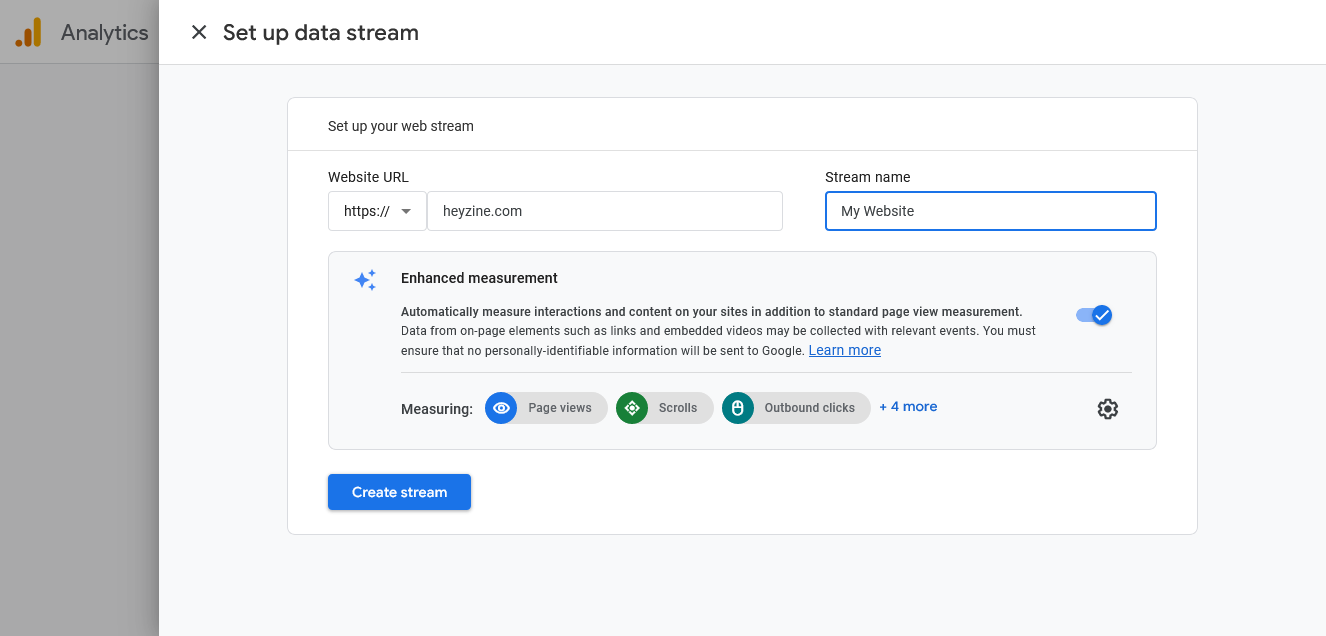
"Set up a data stream," type your Website URL, and type anything for the stream name. In case you don't have a Website, you can simply use "heyzine.com" and click "Create data stream":
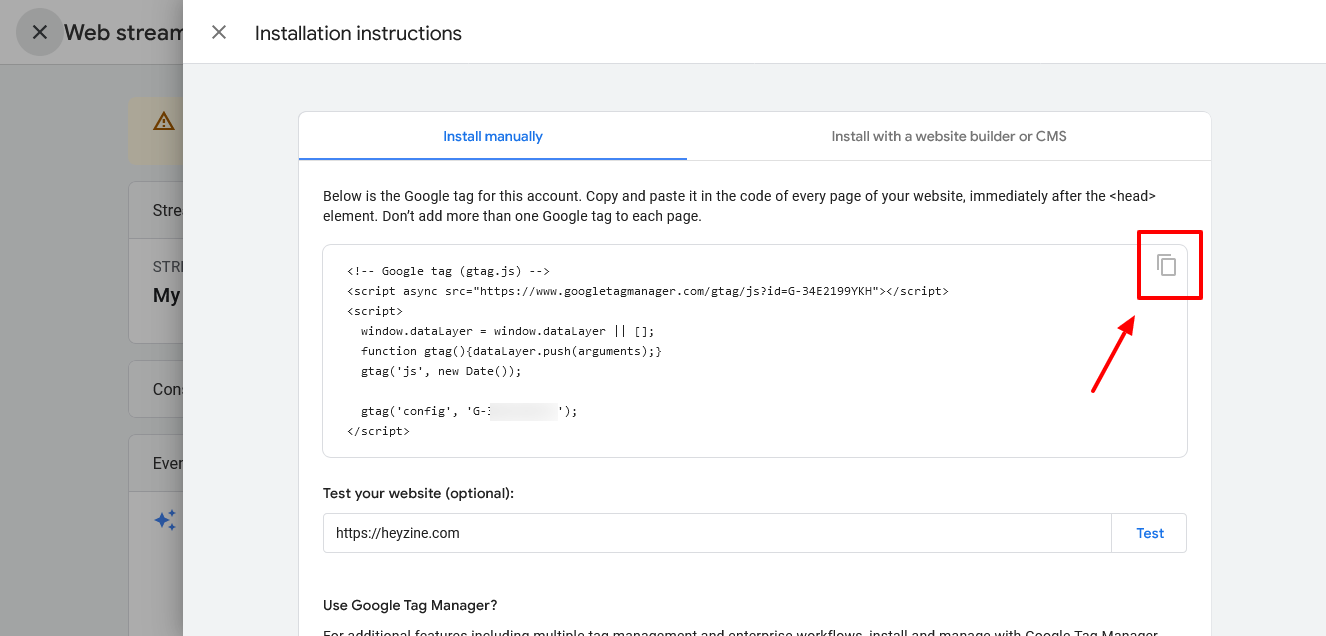
It will show us the installation instructions after a moment, and we will have to select "Install manually" to get the Google Tag code. Then we will click on the copy icon:
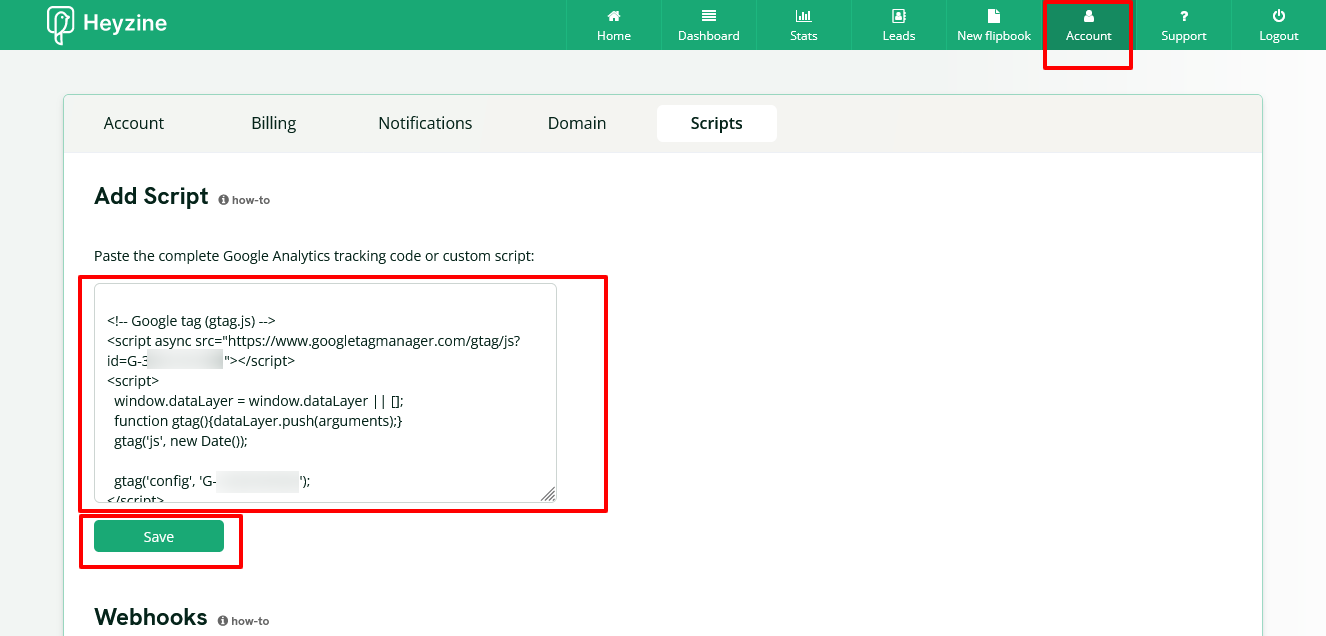
Back to heyzine now, we go to the Account Page and the "Scripts" tab, where we will paste the Google Tag code and we will click Save:
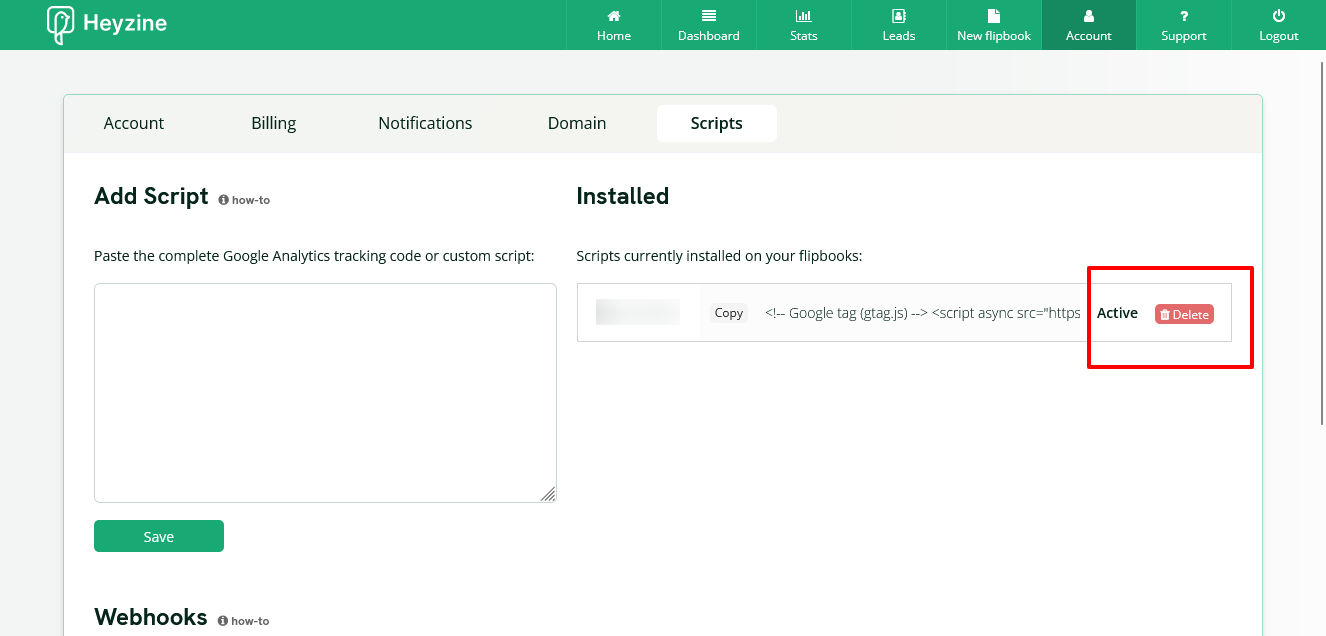
After about 24 hours, the installed script will become "Active," and a new "Delete" button will appear. From that moment on, the script is installed in all the flipbooks and bookshelves on your account.
To test that everything is fine, we can now open one of the flipbooks or bookshelf on a new incognito window or a different browser. We need to do this because the script is not loaded when using a browser with the heyzine session opened to avoid tracking your own visits.
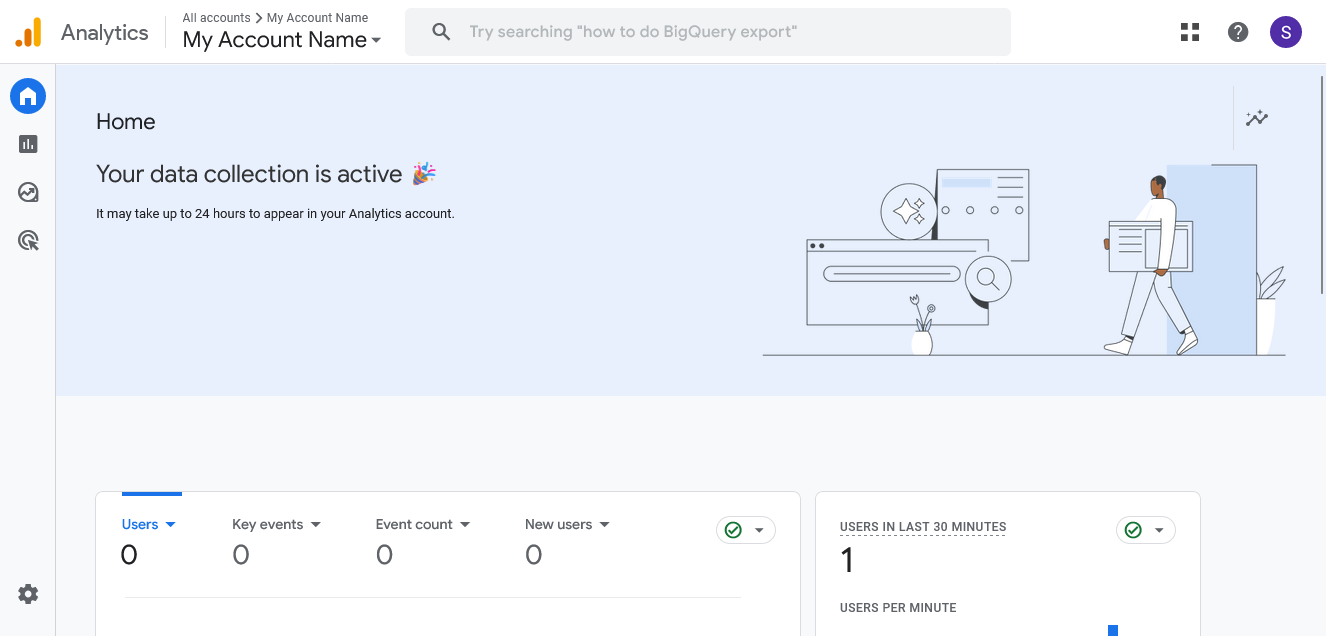
Google Analytics will show that the data collection is active and will start showing your visitor's data:
If you want to learn more about Google Analytics and some more configuration options, we recommend this article from Moz.
Use different codes per flipbook
In some cases, we might want to use one or multiple Google Analytics codes for different flipbooks. Let's say, for example, we designed three flipbooks for Client 1 and one flipbook for Client 2, so we want to use each client's GA code.
The first thing we have to do is create a tag for each one and assign it to their flipbooks. We can do this by clicking a flipbook, "Publish Settings", and type the tag name.
Tagging not only allows us to group but also helps organize flipbooks, filter, search, and more.
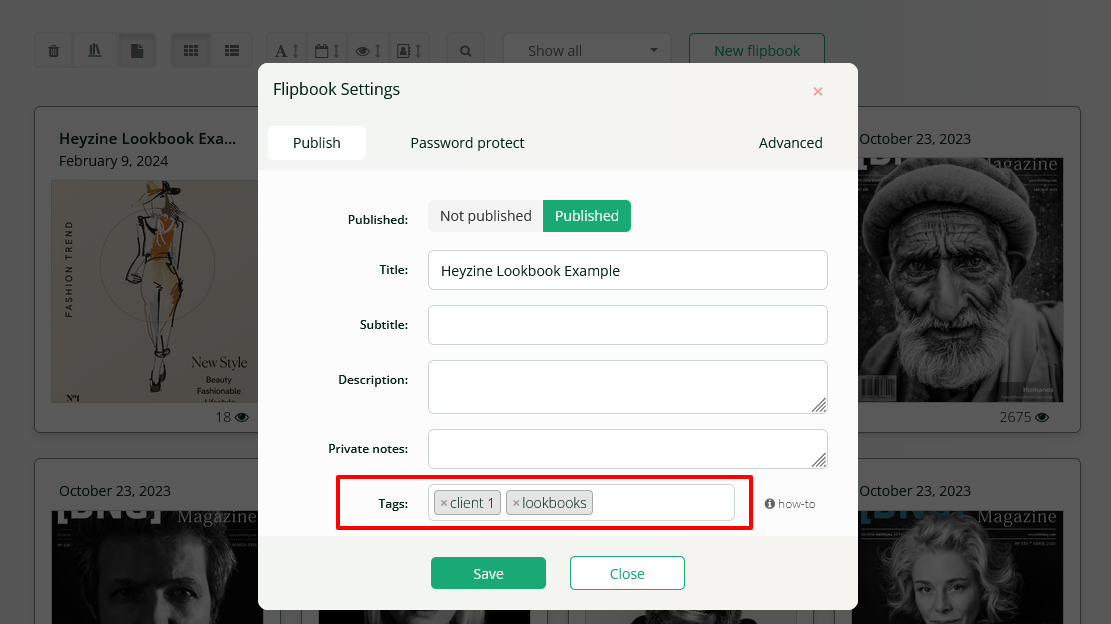
After we have all the flipbooks tagged, we can go to the Scripts section of the Account page, and before clicking save, select the tag on the "Apply to" field:
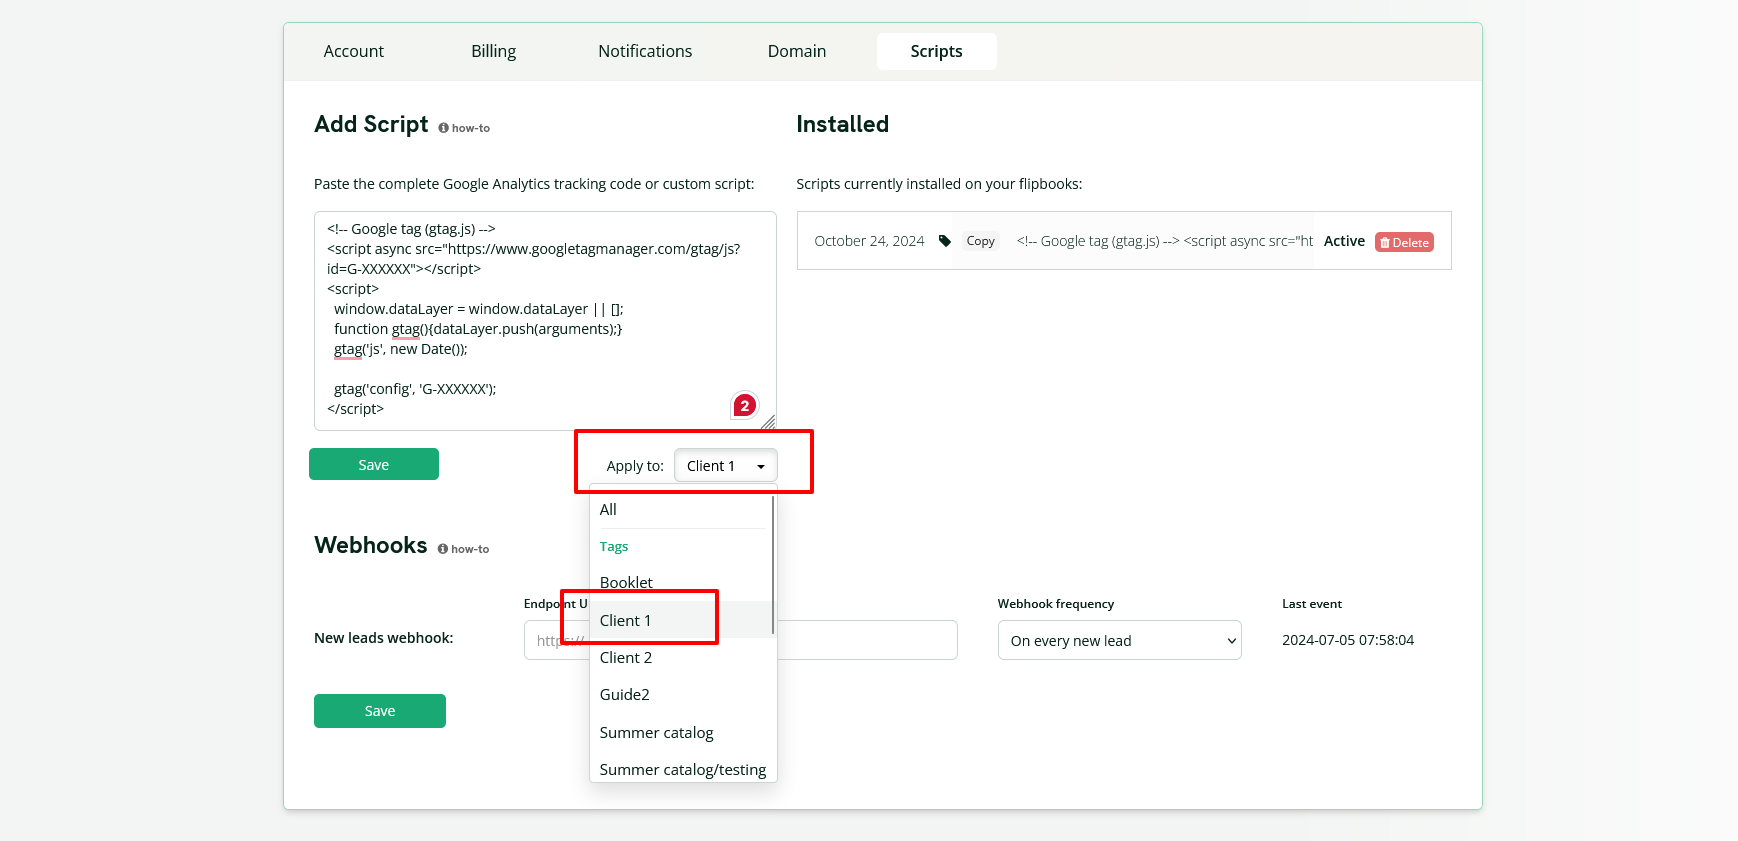
After that, in less than 24 hours, the script or GA code will be active on all the flipbooks tagged, and by simply changing its tags, we can add as many scripts as we want to any flipbooks we want.
Finally, as always, if you need help with the configuration, just contact us at [email protected].

